

Introduction
The digital age has brought about modern technologies. Businesses are evolving using complex technologies. These technologies require user manuals, user guides, and documentation to state how to use them explicitly. Building documentation involves using static site generators.
There are several static site generators built using different languages. Mkdocs comes in handy to solve this problem. Mkdocs is a static site generator used to create project documentation.
This article will cover MkDocs, its installation method, features, and how to use it.
What is MkDocs?
Mkdocs is a static site generator for building project documentation using Markdown. It is a fast, simple, and lightweight generator. Mkdocs requires Python to set up and markdown as documentation source files. It is configured with a single YAML Configuration File.
Mkdocs supports building HTML static files completely. It is a Python package to develop and load web pages. Mkdocs is free to access and geared towards speed and simplicity.
Features of Mkdocs
Customization and Themes
There is a stack of good-looking themes included by default on Mkdocs. You can get themes from GitHub Material, readthedocs, and Bootstrap. The project documentation can be customized based on preference using the theme to make it look beautiful.
Language and Configuration
Mkdocs uses Markdown as the documentation source file. Markdown is an easy markup language to write, like HTML. It also uses simple configuration files like YAML to function.
Preview Site
Mkdocs has a built-in server that allows users to preview documentation. As the documentation is written in Markdown, it can be previewed on the site immediately. It also auto-reloads when changes are saved. To see the latest edit, refresh the browser, and changes made will show on the preview site.
Hosting
Mkdocs supports building HTML static sites that can be hosted on GitHub pages, Amazon S3, Netlify or sites of choice.
Speed and Simplicity
Mkdocs is very simple to use. It is a static site generator that loads pages very fast.
Free to use
Mkdocs is free and accessible to all users. It does not require a subscription or payment methods.
Requirements to use Mkdocs
A recent version of Python and Python Package Manager (PIP) is required to install Mkdocs.
Also, Visual Studio Code, Command Prompt, or Git Bash is required to run the codes to install mkdocs. Visual Studio Code (VSCode) can be used to write the documentation source file in Markdown.
Installation of Mkdocs
To install Mkdocs, it is required to install Python and PIP. This article will cover the detailed steps to install Python, PIP, and Mkdocs.
How to install Python.
Follow this step-by-step process to install Python on your PC.
Install Python from the Python Download Page.
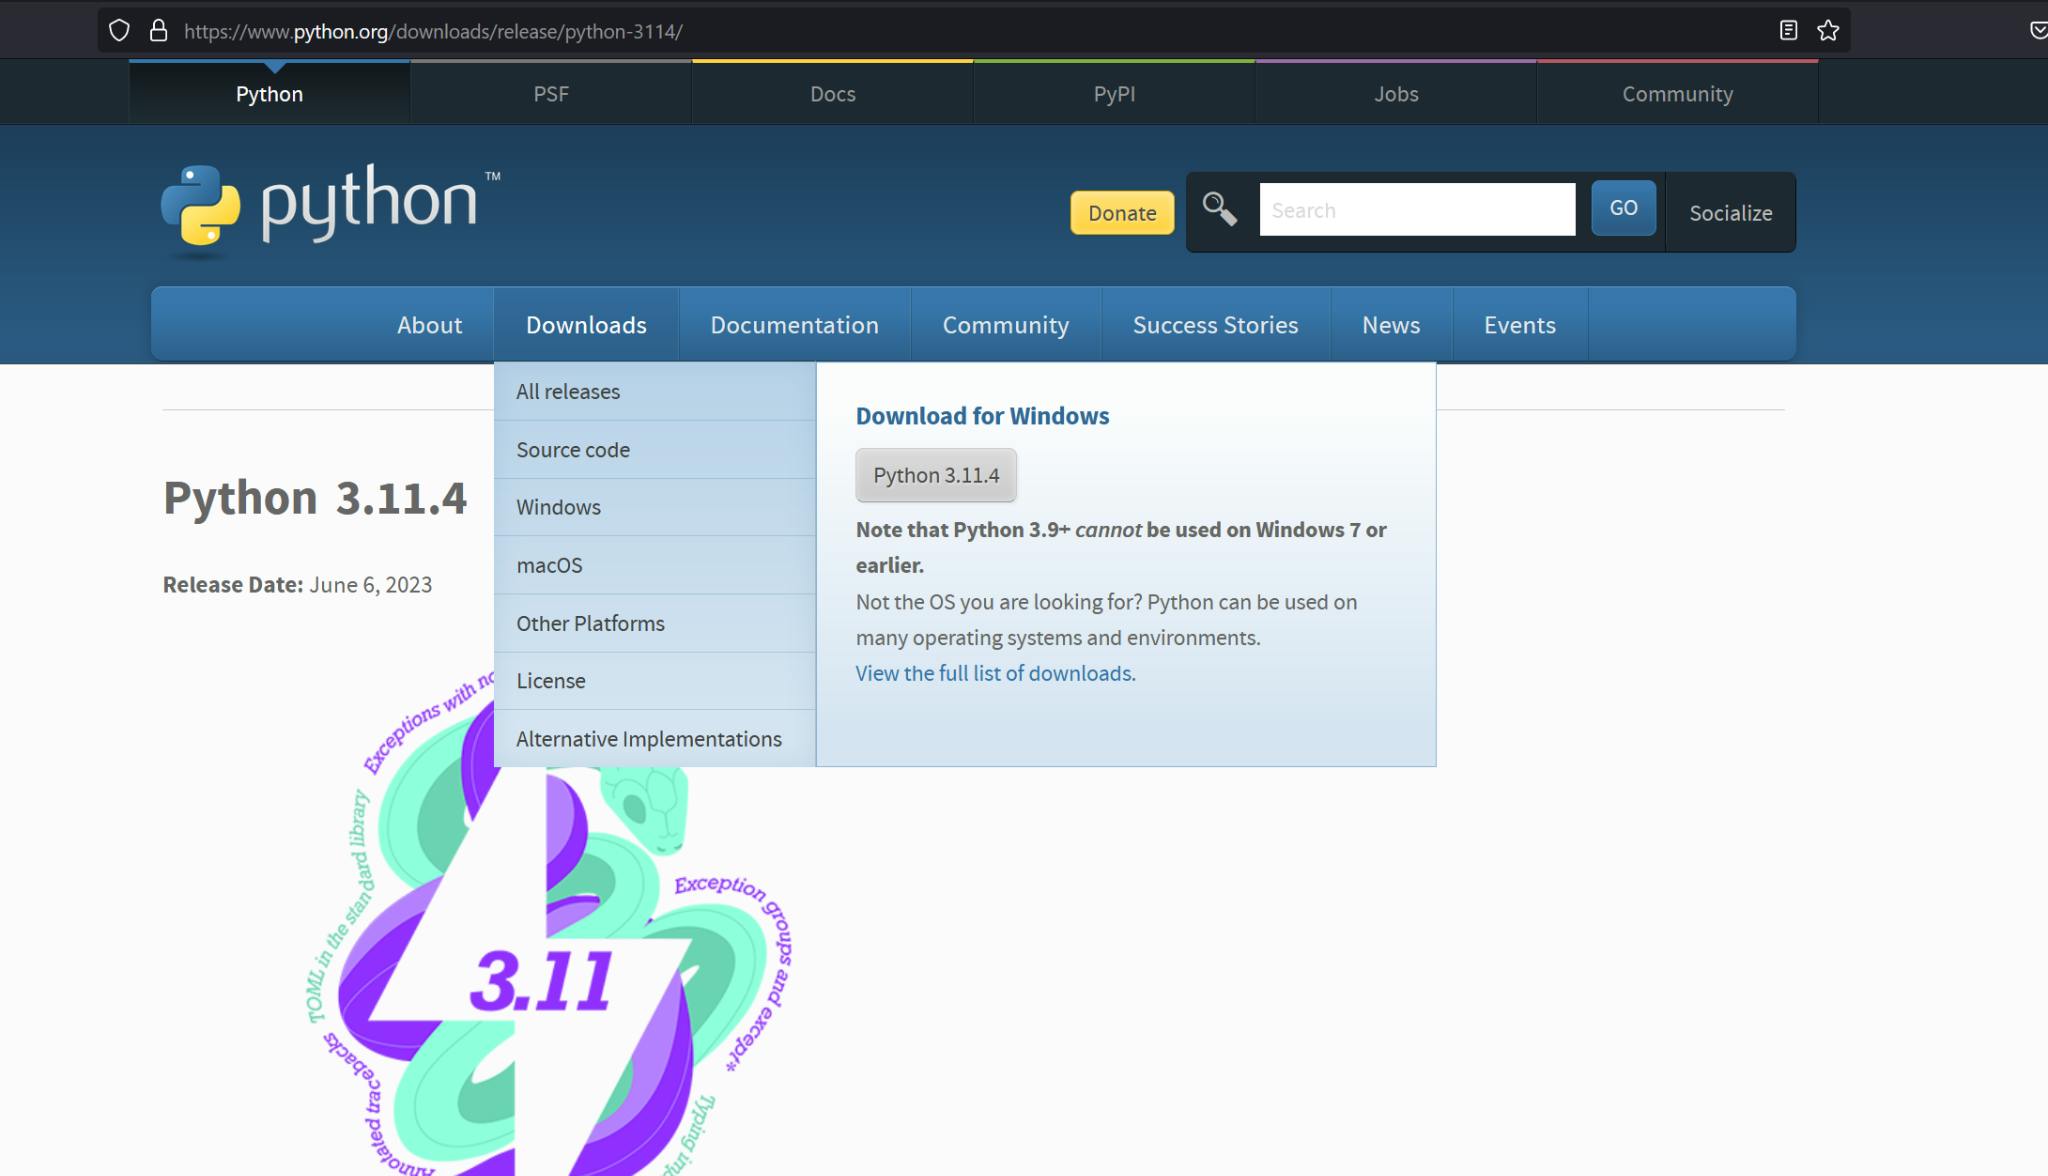
Select the operating system in use. This would automatically download the Python file to the local PC.
Once the download is complete, launch the Python file. Ensure “add python.exe to PATH” is checked. Select ‘Install Now’, and this installs Python on the PC.
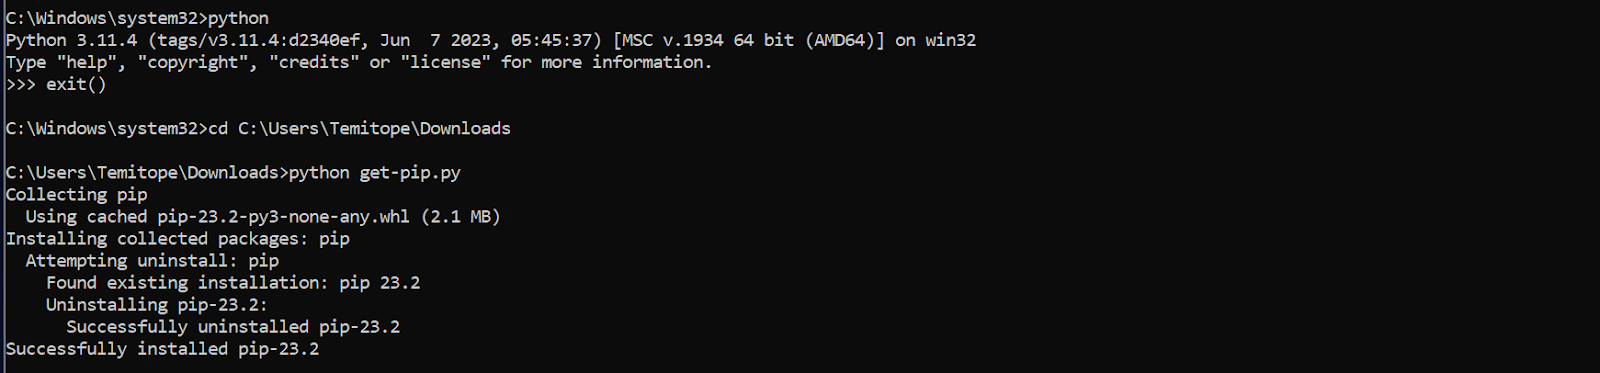
Launch the command prompt on the PC to test if it is installed. Type ‘python’. This would show the version of Python installed.

How to Install PIP
Install PIP using the PIP Download Page. Try it on multiple browsers if it fails on any browser.
Next, open Command Prompt as administrator.
Change the directory to where the PIP file is installed using ‘cd.’ For example, if pip is installed on downloads, set the directory to the path of Downloads.”
Run the command in the below line.
python get-pip.py'This would install Pip on your Windows PC.
Steps to install Mkdocs
Now that you have learned how to install Python and PIP, you can install Mkdocs.
Launch the Command Prompt as an administrator.
To install the Mkdocs Package, run the command in the below line.
‘pip install mkdocs’Mkdocs is successfully installed.

Preparing Documentation with Mkdocs
Creating a new Project
Now that Mkdocs is installed let’s start by creating a documentation site with Mkdocs.
Choose a project directory on your local PC to save the project.
Create a new project by running the commands in the below line.
mkdocs new my-project
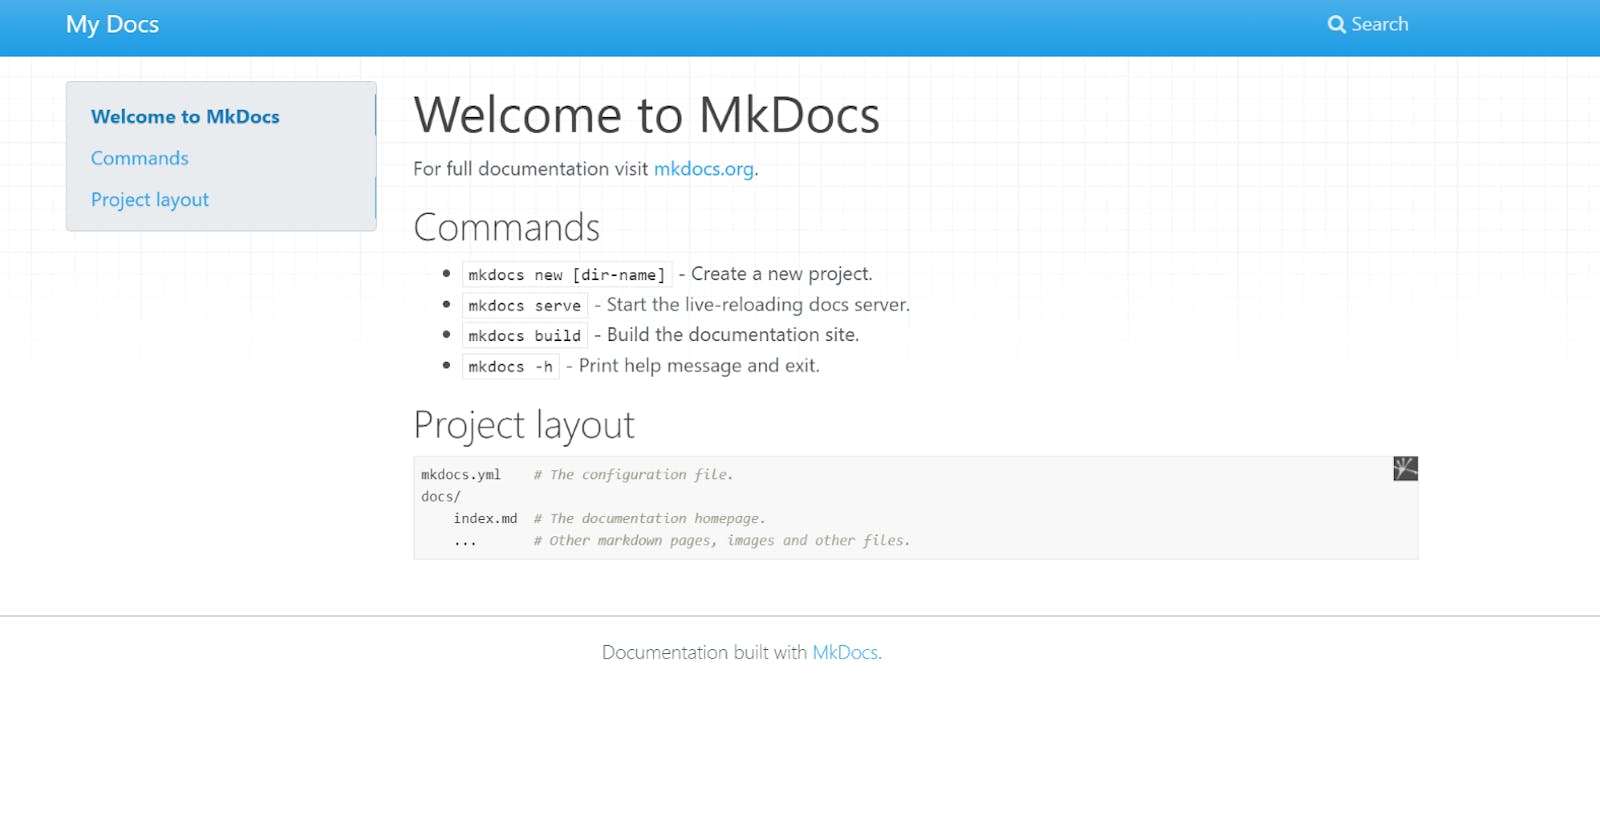
File and Folder structure. Creating a new project will create a new folder. The new folder, called ‘my-project’, gets the default folder structure with the ‘docs’ folder and mkdocs.yml file. The Documentation source file will be in Markdown. The docs folder has a markdown file named ‘index.md’, which can be renamed. The project folder will also have a Single configuration file called mkdocs.yml. The YML file is used to add pages and themes. It is used to configure the project settings.
The folder structure is in this format.
 mkdocs.yml
 docs/
 index.md
Open the project in VSCode. Open it on an editor with Visual Studio code using the command in the below line.
code .
Load the site on your local PC on the web browser. Mkdocs has a dev server to load and preview the site. The command prompt must run from the project's directory to load the site. Run the command in the below line.
cd my-project mkdocs serve
View the site on a web browser. Copy the link - http://127.0.0.1:8000/ and paste it into a browser of your choice. This would load the default home page.
Adding Files and Pages
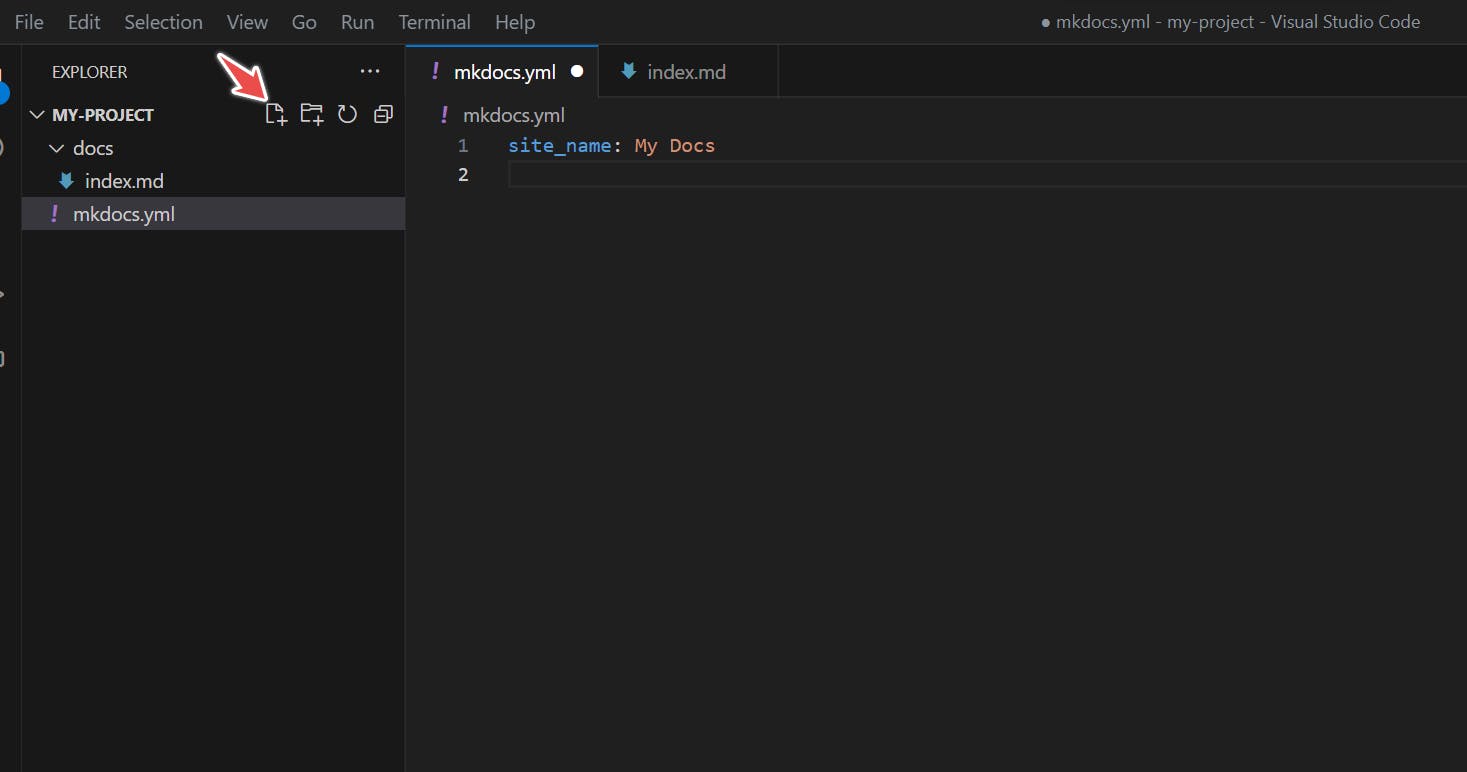
You have successfully created a new project. Project documentation usually have more than one page. To add more pages to your documentation, open the mkdocs.yml file. At first glance, it looks like this:
site_name: My Docs
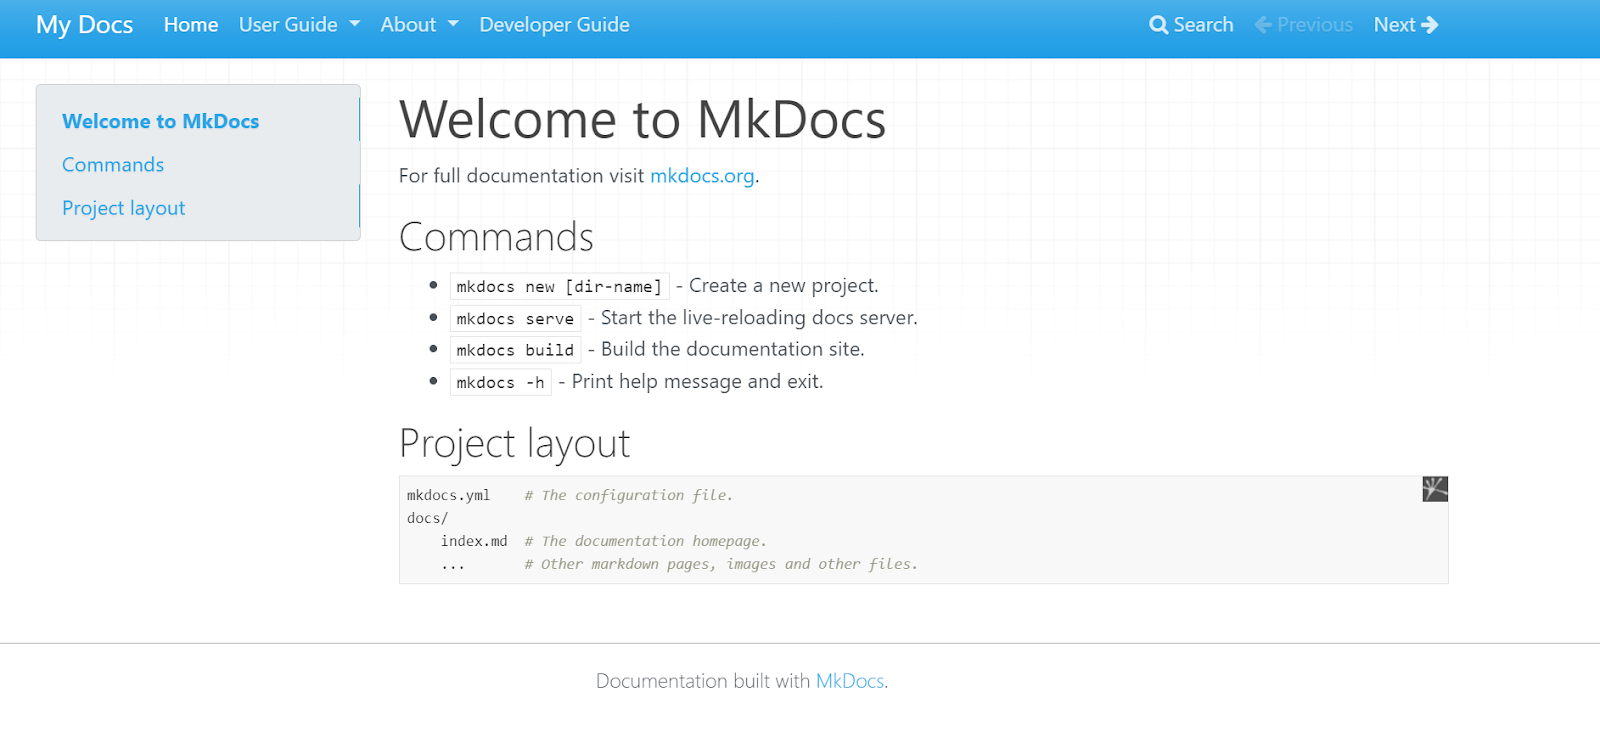
Add the About Page, User Guide, and Developer Guide Pages.
This involves two steps.
Create the files in VS Code.
Add the Pages information in the mkdocs.yml file. Confirm that the new files are created in the docs folder to prevent any errors.
Now, you have the files in mkdocs.yml.
 site_name: My Docs

  Nav:
  -Home: index.md
  -About: about.md
  -User Guide: userguide.md
  -Developer Guide: developerguide.md
Reload the site using ‘mkdocs serve’ in command prompt to confirm that the changes are showing.
mkdocs serve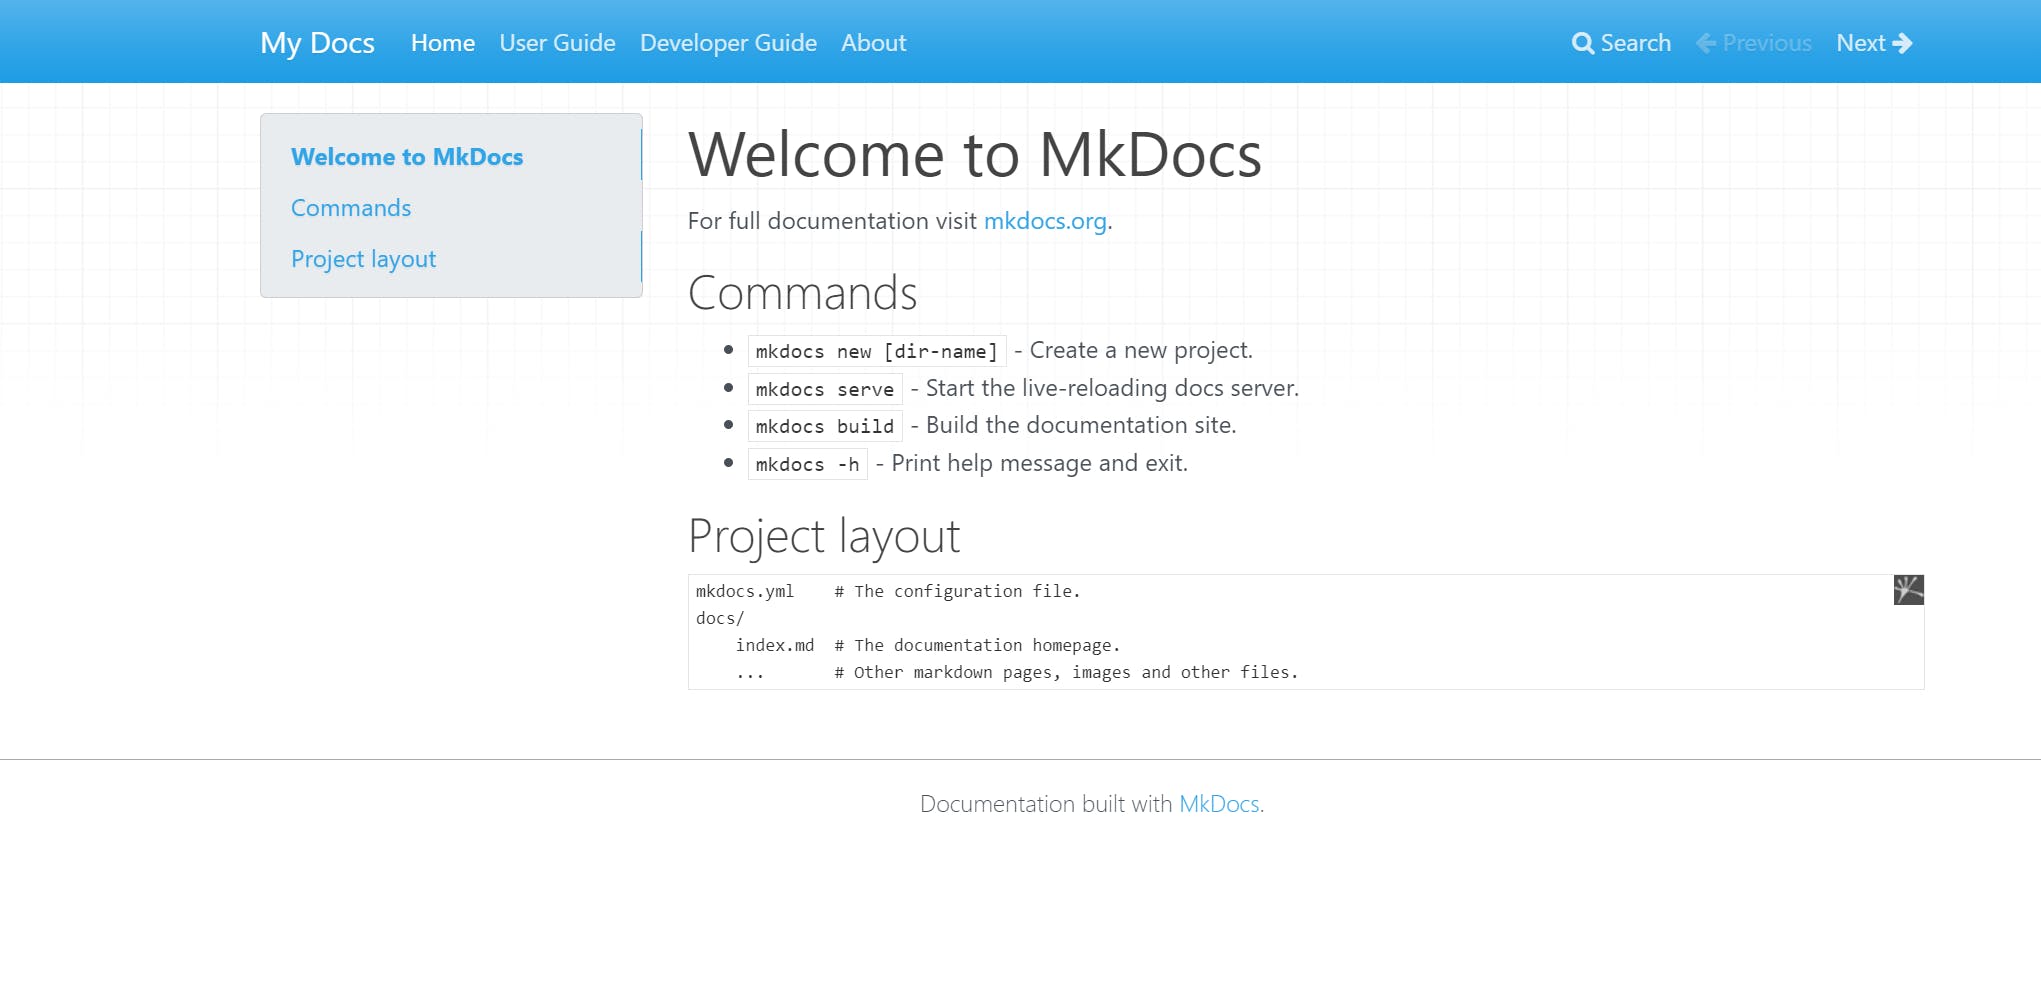
Subsections within pages can be created. The code below highlights creating subsections.
nav:
    - Home: 'index.md'
    - User Guide:
        - Writing your docs: 'writing-your-docs.md'
        - Styling your docs: 'styling-your-docs.md'
    - About:
        - License: 'license.md'
        - Release Notes: 'release-notes.md'

Customize Theme
Themes can be easily customized on Mkdocs. Mkdocs has its default basic theme. However, themes can be changed and customized.
You can access Mkdocs themes from the GitHub MkDocs Theme Page and the Catalog Themes. These are some of the themes that can be used.
Read the Docs. Add the command “theme: readthedocs” to mkdocs.yml; it shows the documentation in readthedocs format.
Material for Mkdocs: This makes searching the documentation easy and creates beautiful and professional documentation. Apply it to your documentation using the Material for Mkdocs Page.
Cinder - This is another beautiful theme that can be applied to the documentation. A step-by-step process to apply the theme is highlighted in the Cinder Theme for Mkdocs.
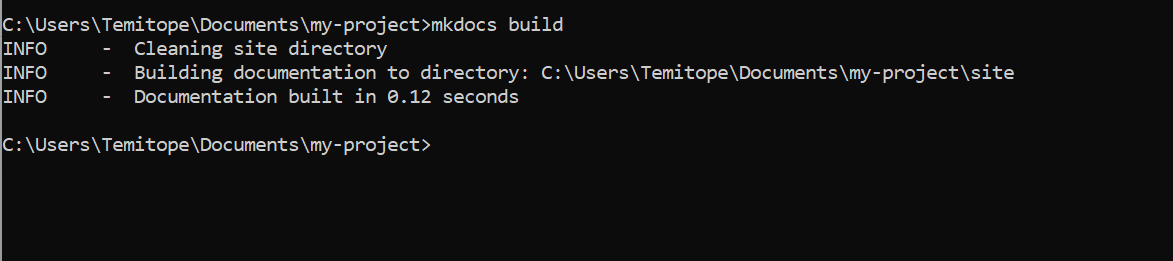
Build the Site
Building the site will create a ‘site’ folder within the local computer containing the files. This site folder makes it easy to deploy the documentation to any site of your choice. To build the site, run the below command.
mkdocs build
Deploy the Docs
The documentation site you just made is made up of only static files, so you can run it from just about anywhere. Just upload the whole site directory to where your website is hosted.
Docs can be deployed to anywhere. GitHub Pages, Read the Docs, or your site. For more information, see Deploying the Docs Page.
To deploy to GitHub Pages, publish and push the local file to a repository on GitHub. Open the repository, and go to Settings and Pages. This shows the GitHub Pages settings. Select the branch to deploy from and save. Within a few minutes, a link will be generated. Copy the link and paste it into a new tab. The documentation is hosted on GitHub Pages successfully.
Conclusion
Congratulations! You have successfully built a documentation site.
In summary, MkDocs is a powerful tool for creating and updating documentation for open-source projects. Following these steps, you can create visually appealing and relevant documentation for projects.